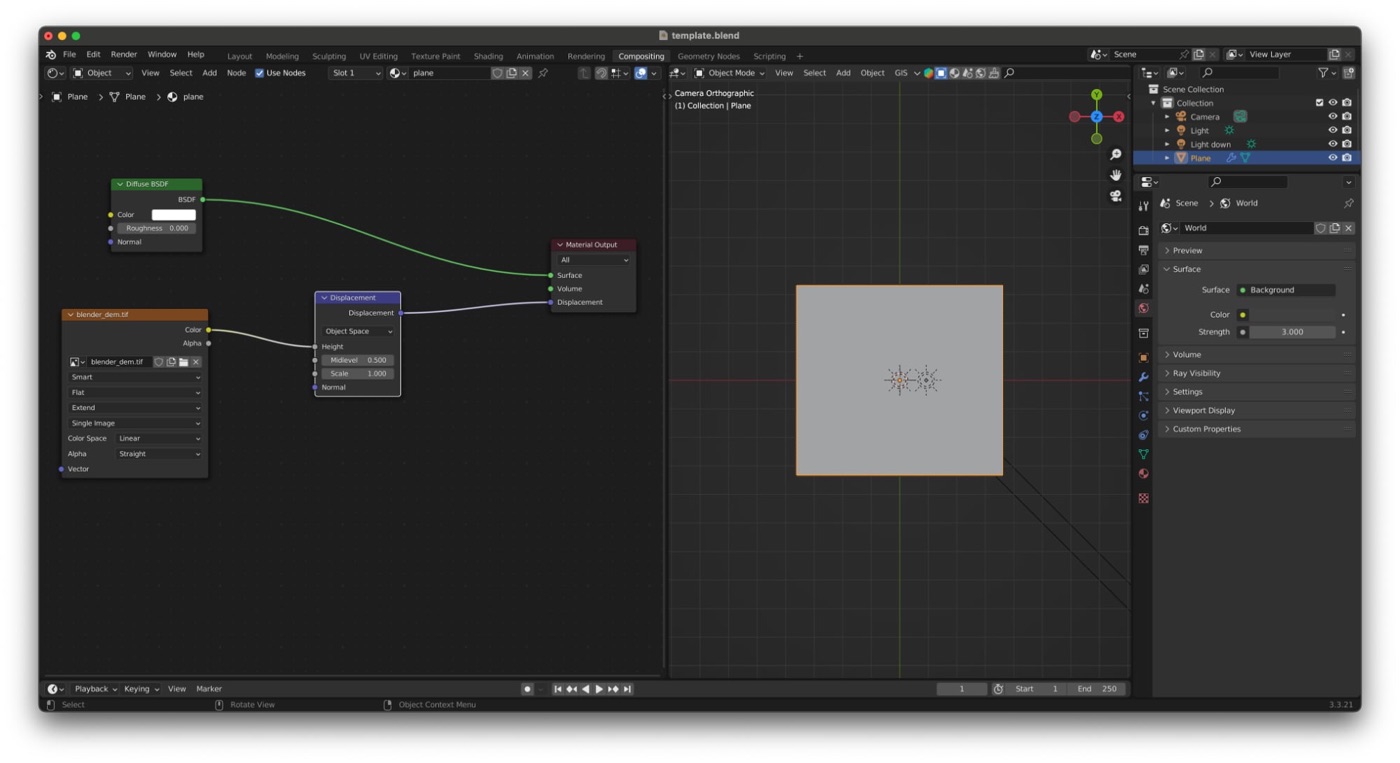
Relievo started because I was tired of repeating the same manual steps every time I needed a shaded-relief base. I wanted to keep Daniel Huffman's method and visual philosophy, but run it as a reproducible CLI pipeline so I could iterate faster, compare alternatives cleanly, and reuse the same workflow across stories.
The tool takes a GeoJSON extent and either downloads elevation data automatically (OpenTopography) or uses a local DEM. From there it processes terrain with GDAL, renders headlessly in Blender, and can add hypsometric tint, clipping masks, and GIS auxiliary files.
Notes on authorship and AI tooling
I want to be explicit about how this project was built. Relievo was developed with strong support from AI-assisted tooling, mainly Codex (GPT-5.3) and Claude (Sonnet 4.6), to speed up implementation and iteration.
To be clear:
- Product direction, workflow design, and core cartographic decisions are mine.
- A significant part of the code was reviewed, adapted, and iterated manually.
- Parts of the implementation were heavily assisted by these models.
For me, this combination was practical: AI accelerated repetitive engineering work, while architectural choices, visual criteria, and editorial priorities stayed under direct human control.
Why I built this
In newsroom conditions, my biggest friction was rarely one difficult step; it was the accumulation of many repetitive ones: download DEM, crop, reproject, normalize values, prepare texture, open Blender, wire things again, fix aspect issues, rerender, export, then repeat for each variation. Relievo removes most of that repetition while preserving manual control where it matters (template design, shading aesthetics, cartographic judgment).
Pipeline overview
GeoJSON bbox
  -> DEM download (or local GeoTIFF)
  -> GDAL preprocessing (crop/reproject/rescale)
  -> Blender headless render
  -> optional color relief / clip mask / worldfile
In practice, this gives me a stable production loop: define extent, test lighting and exaggeration variants, validate readability, and export GIS-aware outputs without changing tools mid-process.
Example 1: Hormuz with separate color layer workflow
One of the most useful workflows is --color-relief-mode both, which outputs the final composite plus an independent color layer for later compositing.
relievo \
  --bbox examples/bboxes/rectangle_iran.geojson \
  --template template.blend \
  --demtype SRTMGL3 \
  --output hormuz_relief.png \
  --color-relief examples/ramp_hormuz.txt \
  --color-relief-mode both
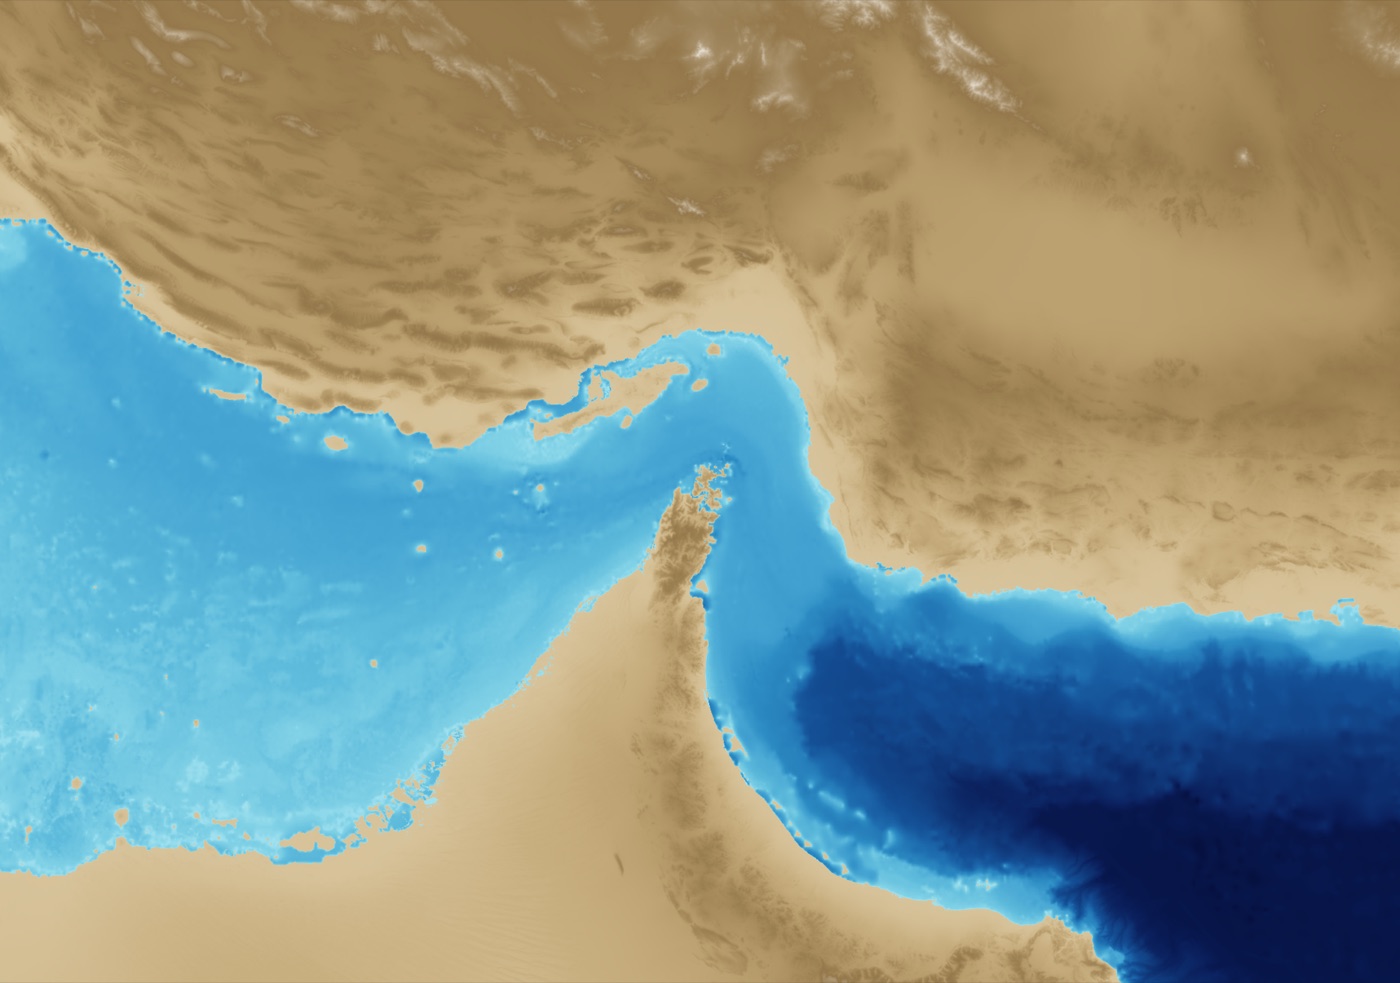
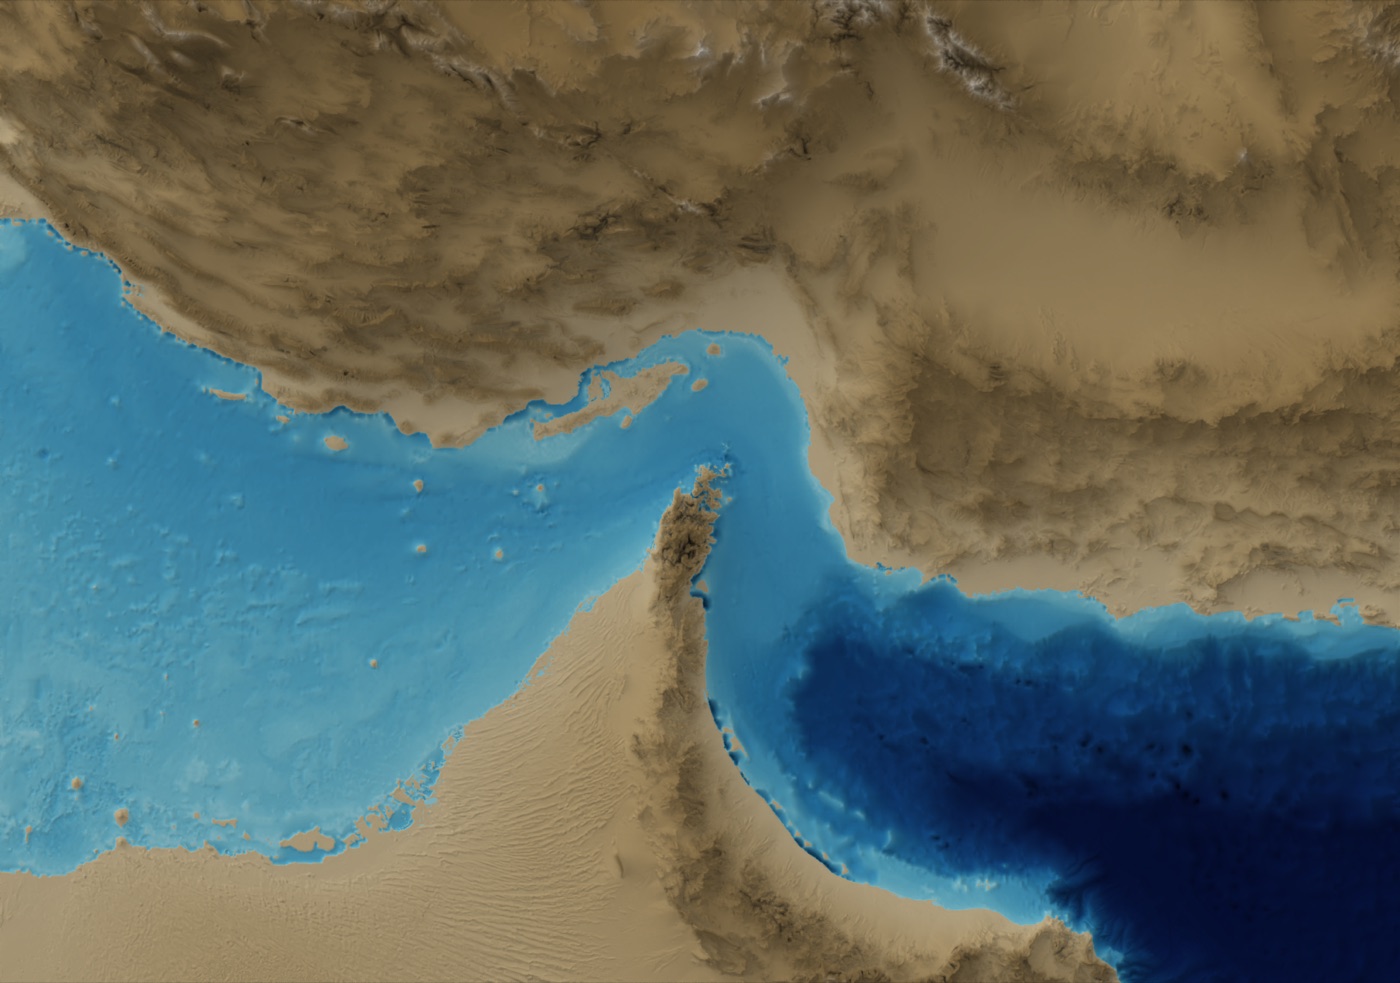
This mode is especially useful when final composition happens outside Blender. I can keep one render as the base and test different color treatments quickly.
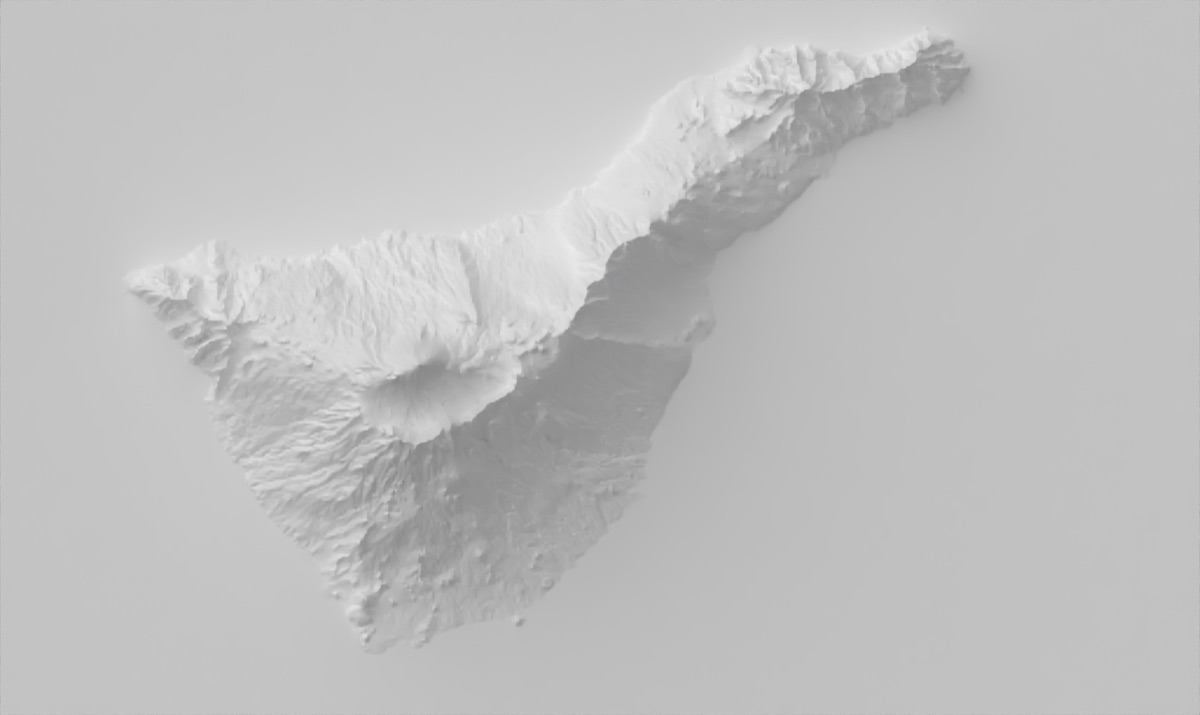
Example 2: Light direction as narrative control
Changing light azimuth and altitude can completely alter terrain readability. Relievo exposes this directly from CLI so I can generate controlled comparisons quickly.
# NW light (cartographic convention)
relievo ... --light-azimuth 315 --light-altitude 35

# South light (more dramatic)
relievo ... --light-azimuth 180 --light-altitude 18
For editorial maps, I usually treat NW light as the safest default. Alternative azimuths are useful for diagnostics and specific narrative effects, but they can reduce legibility if overused.
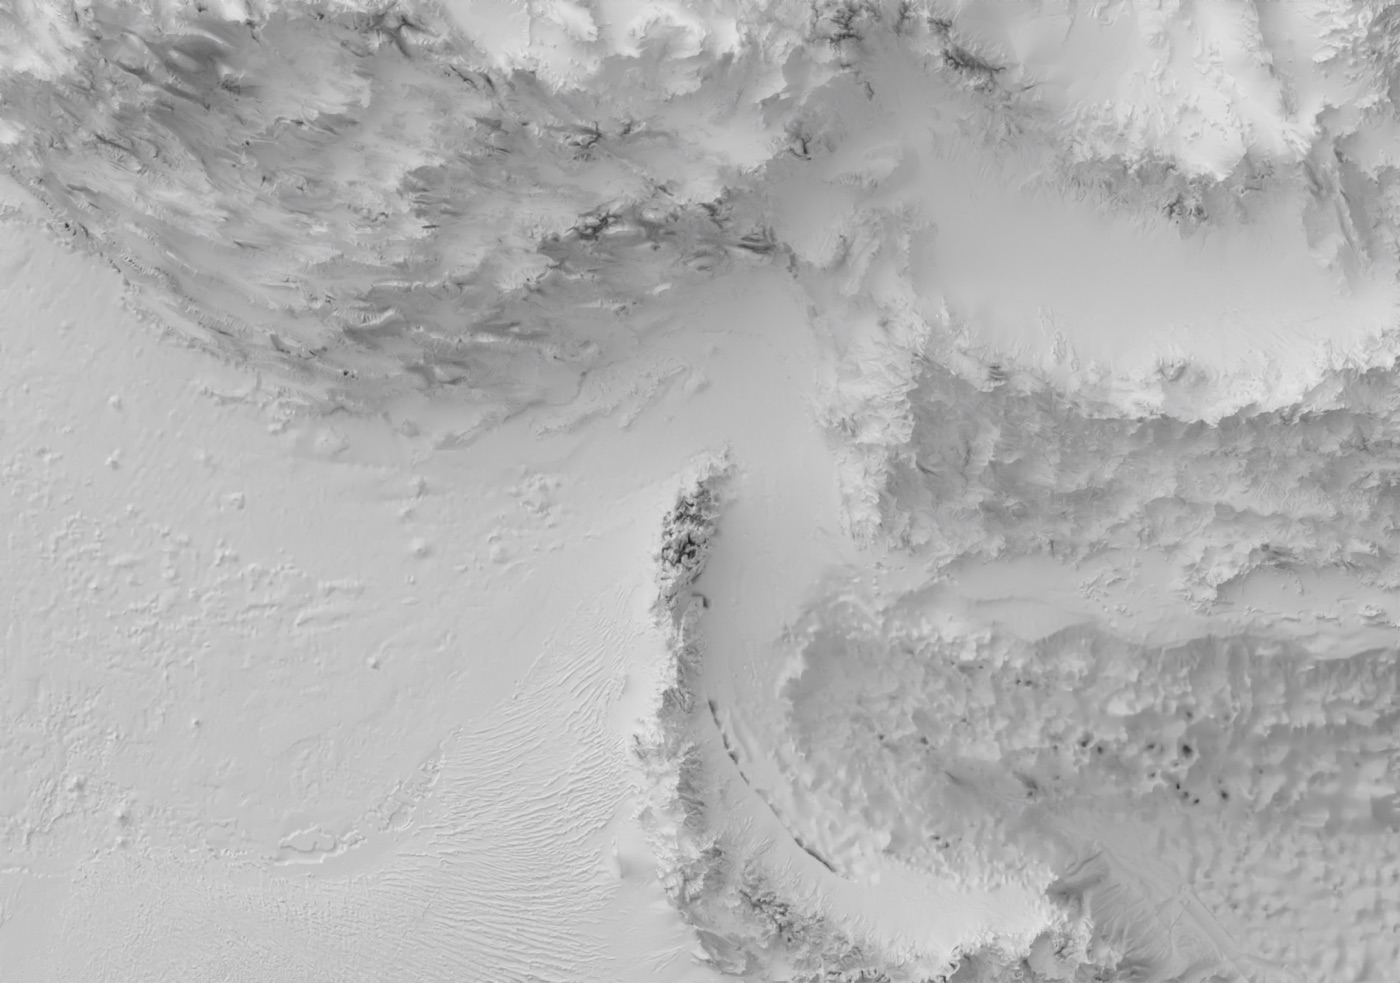
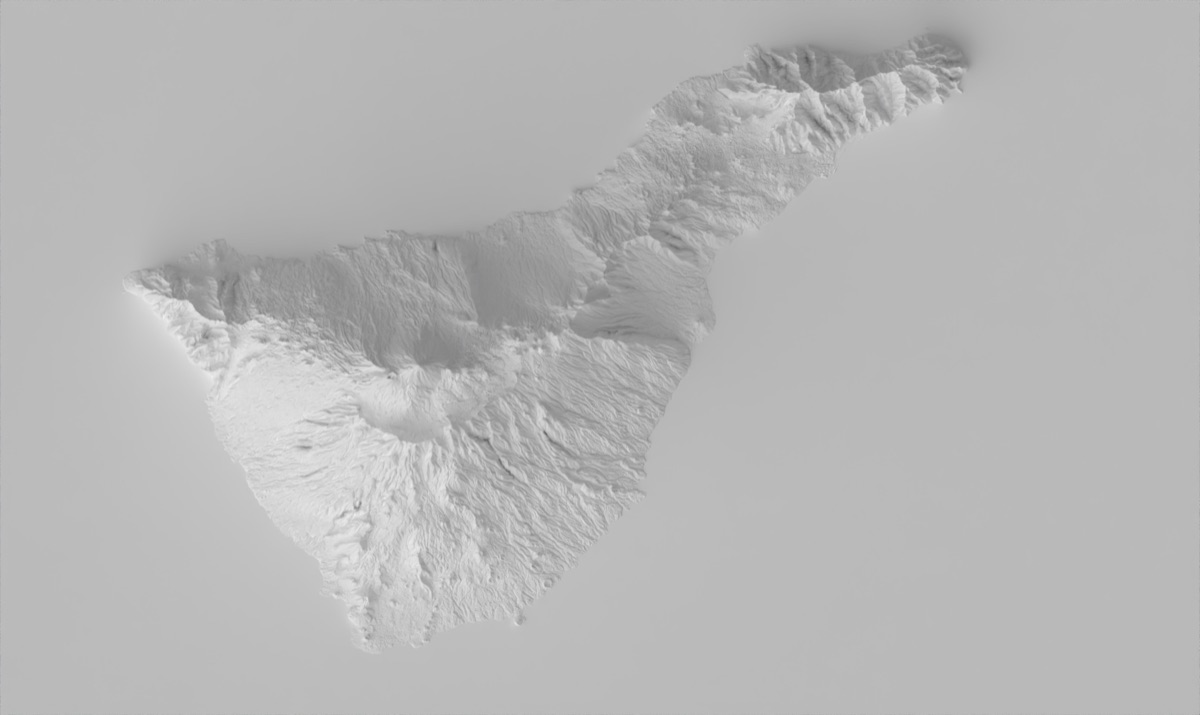
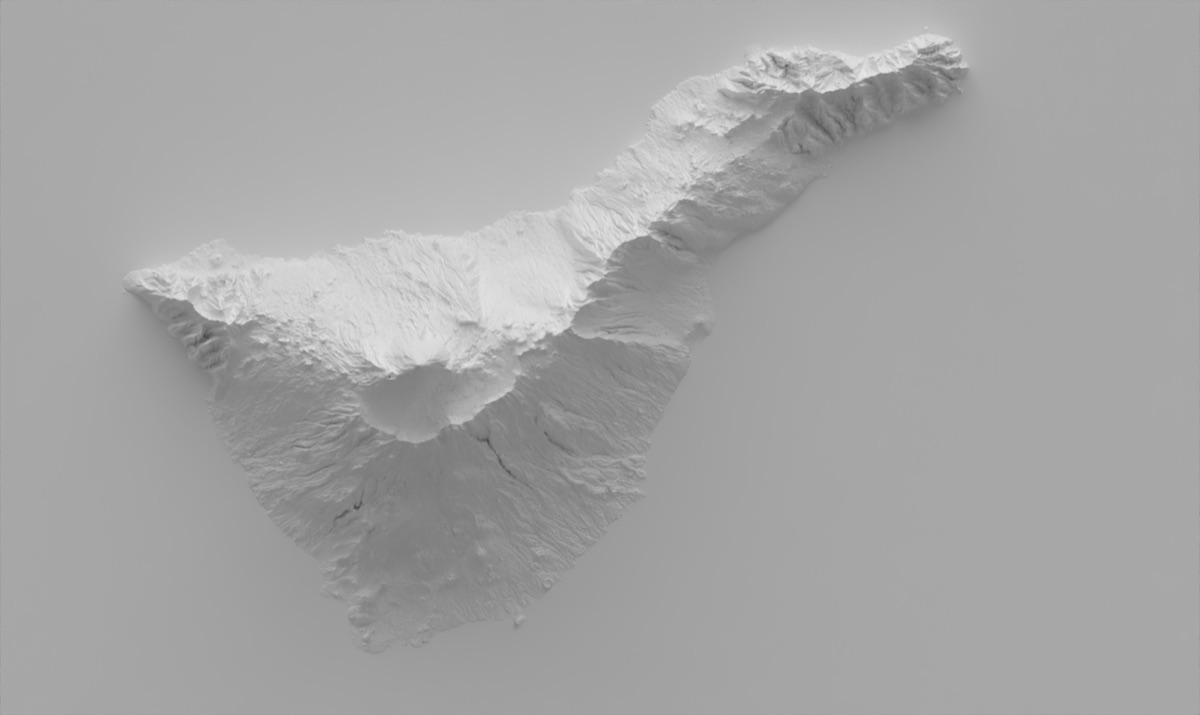
Example 3: Smoothing for regional readability
For medium and large scales, raw DEM detail can become visual noise. The --smooth stage applies a low-pass strategy (downsample + upsample) to emphasize major landforms.
relievo ... --dem dem.tif --output tenerife_sharp.png
relievo ... --dem dem.tif --smooth 8 --output tenerife_smooth.png

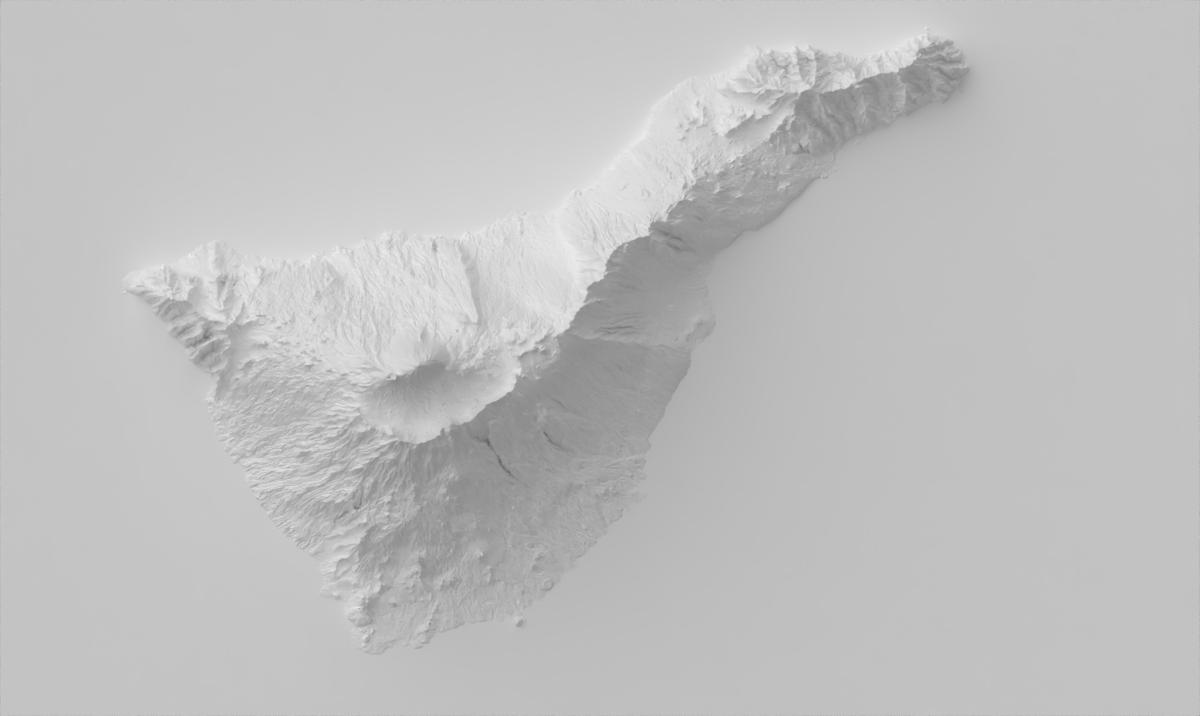
Example 4: Clip mask and GIS auxiliary files
For publication workflows, rectangular outputs are not always enough. Relievo can clip to the polygon geometry and optionally write worldfile auxiliary files for direct GIS placement.
relievo \
  --bbox examples/bboxes/tenerife_bbox.geojson \
  --template template.blend \
  --dem dem.tif \
  --output tenerife.jpg \
  --clip-mask \
  --worldfile

# generated auxiliary files
# - tenerife.jgw
# - tenerife.prj
This makes it much easier for me to move from render to mapped context without manual georeferencing steps.
Example 5: Fast iteration with dry runs and reusable DEMs
When working under deadline, the dry-run + saved DEM pattern prevents expensive repeated downloads and shortens the feedback loop.
# estimate request and output dimensions first
relievo \
  --bbox examples/bboxes/tenerife_bbox.geojson \
  --template template.blend \
  --output preview.png \
  --dry-run

# one download, many renders
relievo \
  --bbox examples/bboxes/tenerife_bbox.geojson \
  --template template.blend \
  --no-render \
  --save-dem tenerife_raw.tif

relievo \
  --bbox examples/bboxes/tenerife_bbox.geojson \
  --template template.blend \
  --dem tenerife_raw.tif \
  --output final.png \
  --light-azimuth 315 --light-altitude 35
Reliability and release strategy
I shaped Relievo as a product, not just a one-off script. That means tests around CLI behavior and processing modules, CI checks, and small iterative releases so changes remain tractable while the feature set grows.
This approach helps keep the tool dependable in real usage, where map production usually requires many reruns with slight parameter changes.
What I would improve next
- Add preset profiles for common map scales and terrain types.
- Extend test coverage for projection edge-cases and antimeridian behavior.
- Ship a lightweight gallery builder for quick comparison sheets.
- Add optional style packs (ramps + lighting + exaggeration defaults) for editorial use.